blender 2.8 2d drawing to 3d
Grease Pencil in Blender 2.eight - Introduction [ENG]
In this tutorial for Blender 2.eight in english language we will encounter how this tool has changed in the passage of Blender from version 2.79 to 2.8. The Grease Pencil at the beginning was just a tool to draw minor notes in the 3D View, to provide explanations about the projection that was existence realized, but later it was enriched with new features, concerning both the drawing and the animation, which transformed it in a existent 2D drawing tool within a 3D modeling software.
In Blender two.eight, in the current release, the Grease Pencil tool has been divided into 2 parts, from a logical bespeak of view, a simpler one for making annotations only and a more "rich" ane that allows you to create existent cartoons.
We therefore try to describe the primary tools bachelor.
The Grease Pencil as a tool for creating annotations:
In the instrument console on the left, which can be recalled past pressing the T key, yous can select some bones tools, including the "Annotate" tool

We will then be able to use
- The uncomplicated note, which allows you to describe or write freehand texts,
- The line tool, also useful for tracking reference lines
- The polygon tool, to more than easily create figures or polylines
- The eraser role will be used to cancel and correct what is written.
After using the Grease Pencil for the first fourth dimension, in the panel with the properties of the "Tool" on the correct, which tin be recalled by pressing the N central, by clicking on "Note" a drop-down menu will appear to manage the layers, color and thickness of the pen stroke.

Sometimes you feel the need to write annotations on the entire page, every bit if it were a sheet of newspaper, sometimes straight on the object, for this Blender provides the "Placement" option (which you tin also notice in the panel on the correct in the "Tool" tab)

-
The Placement View allows y'all to create annotations that will be positioned orthogonally to the view, all on the aforementioned airplane.
-
Surface enables drawing directly on the faces of the object, useful for better explaining certain operations
-
3D Cursor is similar to View, but it gives the possibility to position the plane perpendicular to the view in the position defined by the 3D Cursor

The Grease Pencil object:
Most of the new features of the Grease Pencil, including those inherited from previous versions of Blender, tin can be plant in the new grease pencil objects, which can be recalled by clicking on "Add together" in Object Mode, or using the SHIFT + A shortcut

Stroke allows you lot to create a predefined pen stroke, Monkey draws the usual Suzanne but in drawing format, blank instead creates an empty object, similar to empty, into which the bodily drawing can be inserted.
With the Grease Pencil object we will be able to perform all the operations that could exist achieved with the Comment tool, just with the added possibility of having additional tools necessary for drawing and 2D blitheness with Blender.
To admission all the Grease Pencil tools yous can select the "2D Animation" workspace ("second Full Canvass" is like to second blitheness, with less clutter of menus and panels)

or by creating a new "2nd Blitheness" file

Which will provide the user with a real 2D drawing and animation suite

The 2D Animation suite:
From the beginning, the suite opens in describe mode that allows us to immediately draw on the screen.
A tool panel will appear on the left

in which, in addition to the function to position the 3D Cursor, in that location are:
-
Draw, which allows you to draw freehand
-
Fill, the saucepan tool that allows you to fill closed areas with color.

- Erase, which allows you to erase lines previously fatigued in a difficult, soft way with a safe, the single points of which the curve is composed or a consummate line
- Cutter, the cutter tool that allows you to delete areas of a drawing by selecting
- Line, which draws a straight line. Click on the starting betoken and drag the mouse (by pressing besides the E key for the extrusion a broken line is created) by clicking on the Enter key it is confirmed
- Arc, describe an editable arc. Click on the starting indicate and drag the mouse to the second anchor point, drag the bend to adapt it to your needs, press the enter button to ostend. Extruding with the E central, before confirming, you can keep to draw.
- Curve, describe a "double arc" and you can drag the offset slice of arc in one management, the 2nd in some other, to amend adapt them to your needs
- Box, draw a rectangle, holding downwardly the shift key creates a square
- Circle, draw an ellipsoid, holding downward the shift key creates a circle

The top header menu:
If nosotros try to draw with the freehand musical instrument, nosotros immediately discover that the color is non blackness, only greyness because by default the strength (with which the virtual pencil was pressed) has no value 1 but 0.half dozen.

By irresolute this value to ane, drawing afterwards we will go a pure black.
Every bit nosotros can see, in the menu it is also possible to modify the dimensions of the stroke (radius), the material (by default prepare to Black), and the type of castor (by default set to Draw Pencil, that is like to a pencil).
The Grease Pencil cartoon tool already contains predefined brushes

- Describe Block, similar to a highlighter
- Draw Ink, similar to a fountain pen
- Depict Mark, similar to a felt-tip pen
- Draw Noise, similar to a quill
- Depict Pen, similar to a ballpoint pen
- Draw Pencil, similar to a pencil

All the same, we can modify the stroke of our drawing either using the Options console, whose parameters allow yous to modify the curves that interpolate the set of points that form the curve of the fatigued lines, for case by applying more smooth, thus rounding up a sketch made with a manus maybe not very business firm

or y'all can employ the Curves panel, which allows y'all to modify the sensitivity of the stroke, useful for those who employ a tablet and desire to get special effects.

In the Display panel you set the brush icons, the Origin panel instead, as already explained for the annotations, allows you to specify where the lines will be placed ("Stroke" indicates that they will be inserted in the same plane of a drawing already fatigued). "Front end Ten-Z" indicates which view we are in

Very useful are the Guides, which tin be activated by pressing on the button representing a grid, every bit they help in drawing by guiding the artist'due south hand (like a ruler, or the small smash and a string, or the elastic, used by the illustrators), but also allow you to create "suggestions" to keep on an underlying layer, using as a reference the 3D Cursor (cursor option), a point defined by the coordinates (custom) or an object

-
Circular allows yous to create circles around a point

-
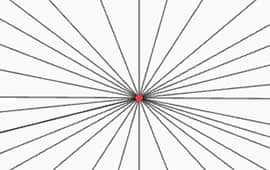
Radial of the lines starting from a point
-
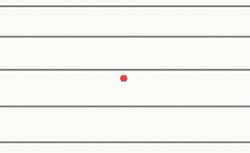
Parallel, draw parallel lines
-
Filigree, describe lines like a grill


By placing the results on multiple layers, we tin can combine them together to use them every bit a basis for creating, for example, a network or the interior of a space colony

or drawings in perspective

The properties:
If nosotros sentinel the Properties Window, we notice that information technology is divided into two parts: a top panel that specifically concerns the Grease Pencil tool and the common property panel.
The upper console contains all the direction of the layers, which allow you to organize and go on all the parts of a drawing split up, and evidence how they are related to each other.

In that location is also the management of the Onion Skinning, which helps in the animations as it displays the drawings of the previous and following frames, of the Vertex Groups equally in the 3D models, of the Strokes visualization, whose thickness can exist improved if they are close or far away.
Even the usual property panel is customized based on the specific characteristics of the Grease Pencil, with interesting differences in the following tabs:
-
Active Tool, contains all the display properties of the pen with which nosotros are drawing
-
Textile, allows you to fix the edge and fill colors for the drawing we are creating. The stroke (optional) tin can be continuous, in dots or squares, made from a line or a texture, the filling (optional) instead can exist uniform, a gradient, a checkerboard pattern, or made with a texture

-
Modifiers, modifiers are also present to help develop projects with Grease Pencil:

Array, to indistinguishable drawings, Build, to create drawing animations in progression, Mirror, to create mirror drawings, Simplify, similar to Decimate for 3D models to reduce the number of vertices of the curve, Subdivide is similar to the function for models 3D. Furthermore at that place are deformation and animation modifiers, associating together vertexes or complete drawings to armor, hooks or lattice grids, and finally modifiers to manage the hue, the saturation, the opacity


Visual effects (Object visual effects):
In improver to the other functions, similar to those applicable for 3D models, the drawings made with the Grease Pencil tin can exist associated with visual effects, which tin can help both in the drawing and in the animations. Many of their effects are viewed in return mode.
Let's see the list of visual effects in Grease Pencil and some examples:

-
Mistiness, more or less blurs the drawing

-
Colorize, redefines the colors of the drawing, giving them an result of gray scale (Greyness Scale), sepia (Sepia), bicolor (Duotone), making it more or less transparent or overlapping a color
-
Flip, mirrors the drawing compared to the 3D cursor, moving it both vertically and horizontally
-
Glow, generates an inner and outer glow

-
Lite, if we assign an empty to "object", we can utilise it to light up the drawing
-
Pixelate, modifies the cartoon every bit if it were low resolution, like erstwhile electronic games
-
Rim, with which it is possible to create internal shadows
-
Shadow, which allows you lot to create external shadows
-
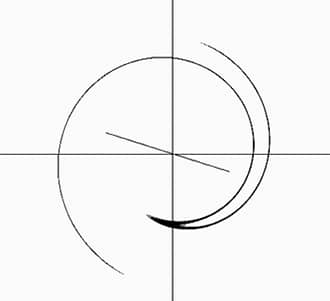
Swirl, create a vortex around an empty assigned in "object"
-
Wave Distorsion distorts according to a certain amplitude, menstruation and phase


Sculpting tools:
Equally for the 3D models, besides the Grease Pencil has its sculpting tools, in Sculpting style, very useful both to meliorate the drawings and to position the various elements of an object during an blitheness

-
Smooth, rounds the stroke and eliminates roughness
-
Thickness, thickens or reduces the thickness of the stroke (depending on whether the + or - button has been pressed)
-
Force, increases or decreases the strength of the stroke (depending on whether the + or - button was pressed), useful for creating lite or shadow effects in the drawing, only without erasing the stroke, every bit an eraser would practice
-
Randomize, makes a line flickering (useful for creating tree branches, lightning, wavy hair etc.)
-
Grab, stretch the drawing, to be used when you want to improve the shapes of a drawing already fabricated, or modify the position of the elements of a subject during an blitheness
-
Push, similar to the grab when nosotros are considering a single line, but dissimilar when acting on several elements, since the catch favors the dragging of the start focused stretch, while the push acts more on the other adjacent elements
-
Twist, twist the selected elements
-
Pinch, similar a pinch, brings together the elements present within the instrument's range of activeness
-
Clone, in edit fashion nosotros select a part of the cartoon, then nosotros return to sculpt mode and where we click volition exist copied the piece of the memorized line

Edit Mode:
When we select the Blender Edit Fashion display way for the Grease Pencil tool, past pressing the A cardinal we discover that the drawing we accept created is nothing just a set of vertices and curves that interpolate the fatigued line. Also in this case there are tools that can help us in the work;

in fact, in addition to the usual selection, displacement, rotation and scale tools, there are:
-
Extrude, which helps extrude selected vertices through an interesting handle marked "+"
-
Radius, which expands and contracts the radius of the selected vertices

-
Bend, which distorts the selected object, rotating it around the 3D cursor
-
Shear that distorts the object forth the axis
Together with Shear, To Sphere is present, which rounds off the selected drawing


Weight Paint mode:
To realize animations, it is possible to associate the armature to the drawings, it is therefore as well nowadays for the Grease Pencil a weight paint part, with its paint tool that colors the vertices of a cartoon stroke from blue to carmine, to manifest the influence that the bones must have on the element

It concludes hither this little introduction to the Grease Pencil in Blender 2.viii in english, in which nosotros have tried to illustrate some of the most important tools bachelor. Many features have been omitted and will probably be explained in the side by side tutorials on this topic.
Source: https://www.graphicsandprogramming.net/eng/tutorial/blender/the-grease-pencil/grease-pencil-in-blender-2-8-introduction
0 Response to "blender 2.8 2d drawing to 3d"
Post a Comment